Semiconductor Yield Predictor
Machine Learning | 2025
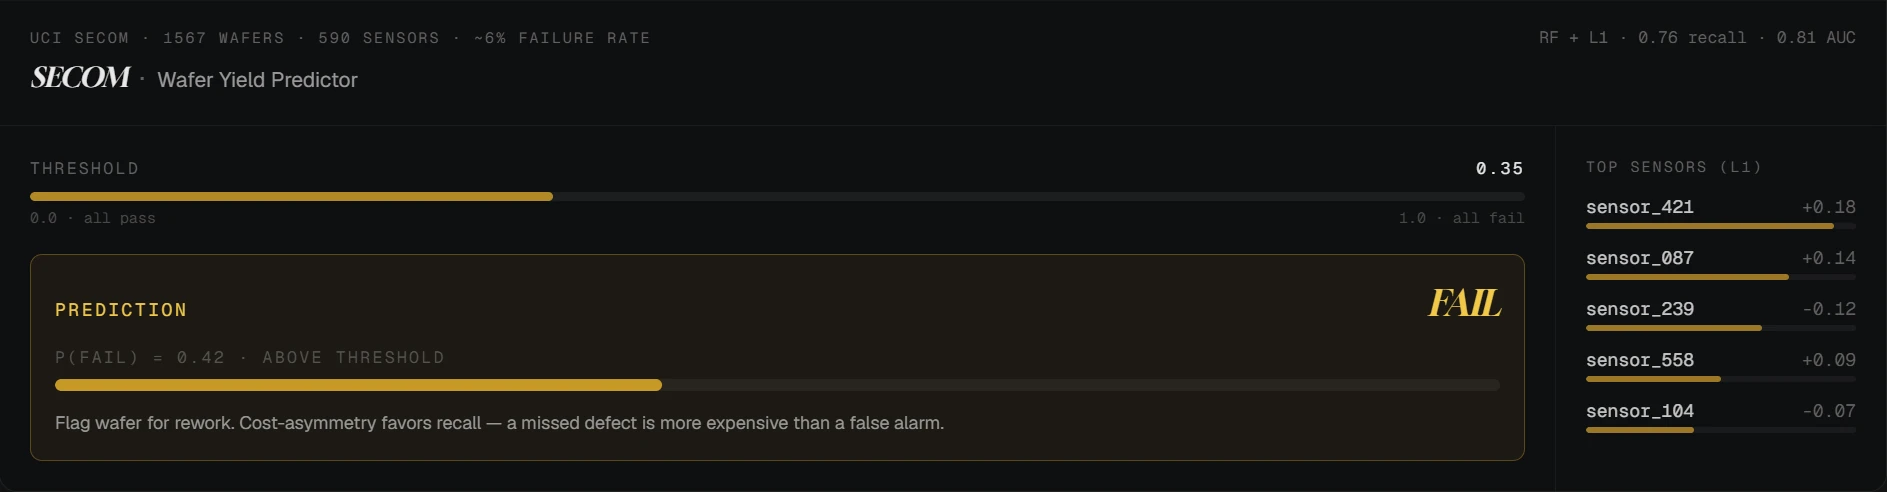
Catch the wafers that fail, even when failure is six percent.
End-to-end ownership: data audit, preprocessing pipeline, L1 feature selection, model comparison across five candidates, threshold tuning, and a Streamlit operator UI with a live recall / false-alarm knob. The deliverable is a single-line decision, PASS or FAIL with calibrated probability , that an operator can trust, set their own threshold against, and re-tune as their fab's cost asymmetry shifts.
A four-stage pipeline serialized to joblib artifacts, imputer, scaler, L1 selector, Random Forest, plus a Streamlit UI that loads the artifacts at boot and exposes the decision threshold as a live slider. Notebook for training; app.py for inference; nothing more.
Trained, evaluated, and packaged with the deployed secom/app/app.py Streamlit demo. The final Random Forest + L1 model beats four baselines (incl. XGBoost + SMOTE) on the metric that actually matters for a fab: recall on the failure class.
Five models, one metric that matters: recall on the rare class.
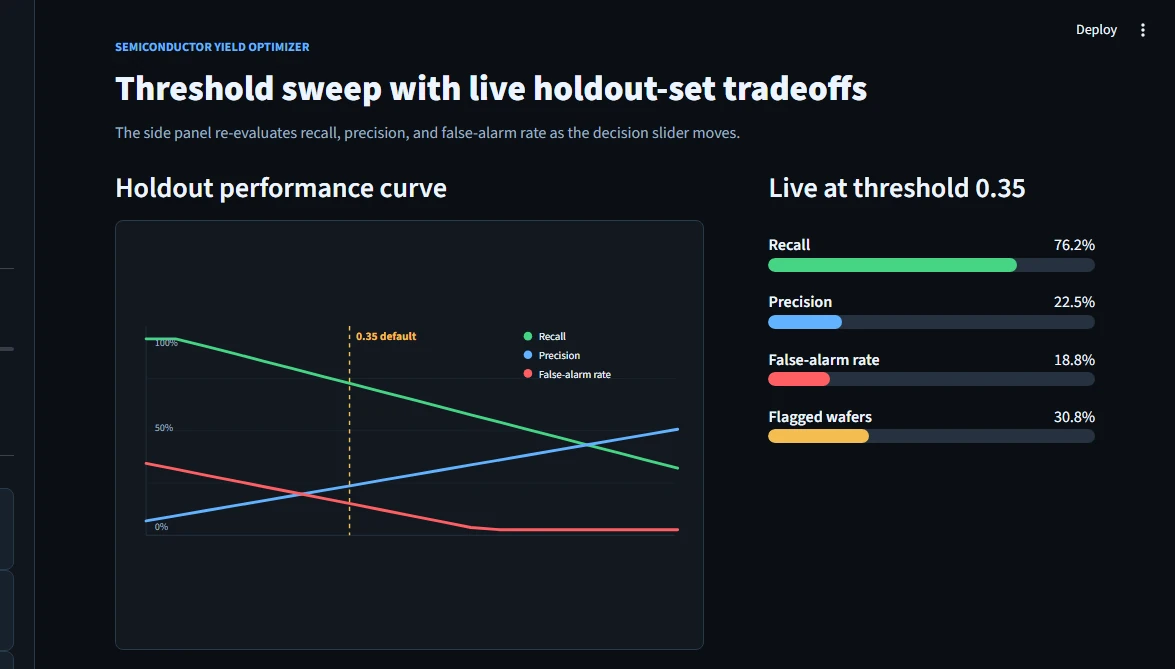
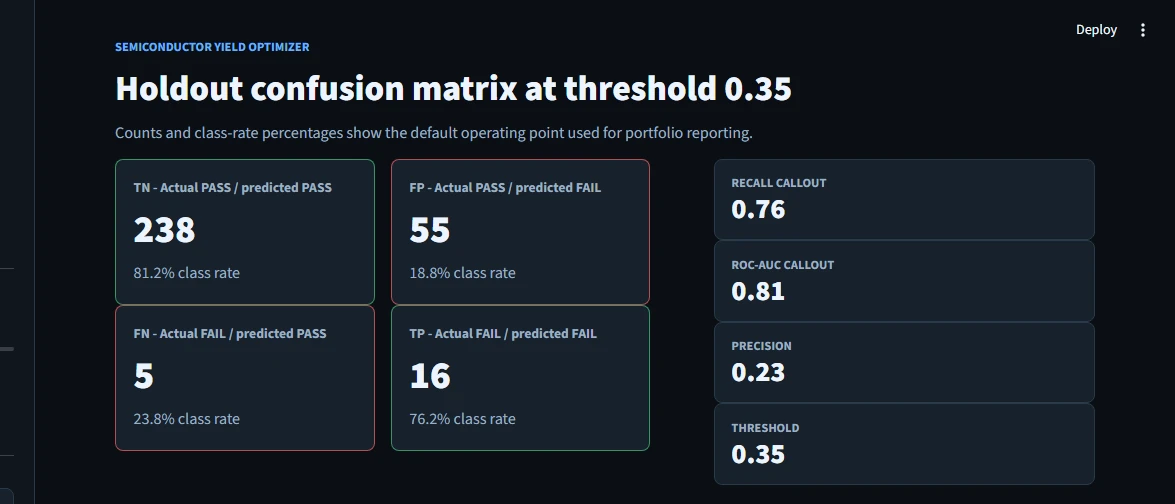
On a dataset where ~6% of wafers fail and 14 out of 15 are good ones, classifiers that look great on accuracy are useless, you can predict “PASS” for every wafer and hit 94%. The right question is how many of the actual failures did you catch? Final model catches 76% at a 0.35 threshold, against a naive-LogReg baseline of 14%.
| Model | Recall | Precision | F1 | ROC-AUC |
|---|---|---|---|---|
| Naive Logistic Regression | 0.14 | 0.14 | 0.14 | , |
| Cost-Sensitive Logistic Regression | 0.29 | 0.15 | 0.20 | , |
| ROS Logistic Regression | 0.29 | 0.15 | 0.20 | , |
| XGBoost + L1 + SMOTE | 0.57 | 0.15 | 0.24 | , |
| ★ Random Forest + L1 (Ours) | 0.76 | 0.23 | 0.35 | 0.81 |
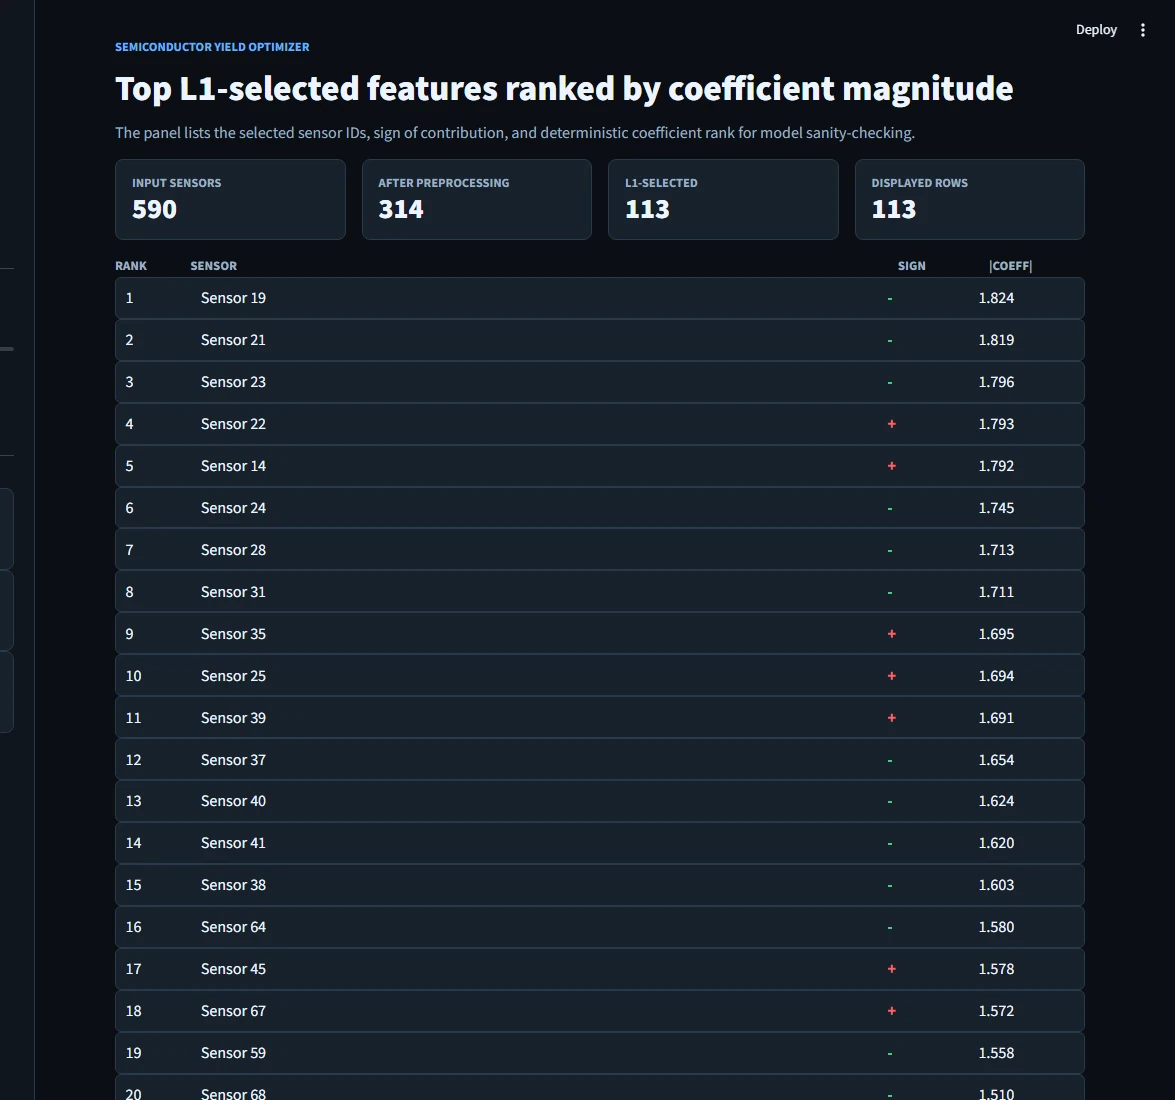
C=0.1) narrows the input to ~113 statistically relevant sensors before any tree gets built.Semiconductor yield is the difference between a $400 wafer and a paperweight.
Modern fabs run hundreds of sensor streams across every step of wafer fabrication, etch, lithography, deposition, polishing. A failing wafer usually leaves a fingerprint in the sensor data, but the fingerprint is buried inside hundreds of correlated dimensions with most failures concentrated in a handful of them. The SECOM dataset is the canonical public benchmark for exactly this problem.
“A typical wafer fabrication process is a complex sequence of operations. Continuous-valued sensor signals are collected throughout, but only a subset are useful for predicting yield.”
“Equipment reliability and overall equipment effectiveness (OEE) are measured in part by the rate of out-of-spec product.”
“With a 14:1 class imbalance, naive classifiers default to predicting the majority class. Accuracy looks great; recall on the rare class is near zero.”
“Cost asymmetry: a missed defect can cost 10-100x what a false alarm costs, depending on where in the process it escapes.”
A 14:1 class imbalance, 590 sensors, 104 failures.
Five candidates, four design decisions, one operator-ready slider.
Naive baselines.
First sprint was deliberately under-engineered: logistic regression, no class weighting, no oversampling. Got 14% recall on the failure class. The point wasn't to ship this, the point was to anchor the ceiling of “what you get if you don't treat the imbalance.”
Three imbalance fixes, all hit a wall.
Cost-sensitive LogReg (class-weighted), ROS LogReg (random over-sampling), and XGBoost + L1 + SMOTE. Recall climbed, 0.29 / 0.29 / 0.57 respectively , but each in a way that hurts production: XGBoost + SMOTE over-corrected and flagged 80%+ of wafers as failures. Useful recall, unusable precision floor.
L1 → Random Forest with class_weight='balanced'.
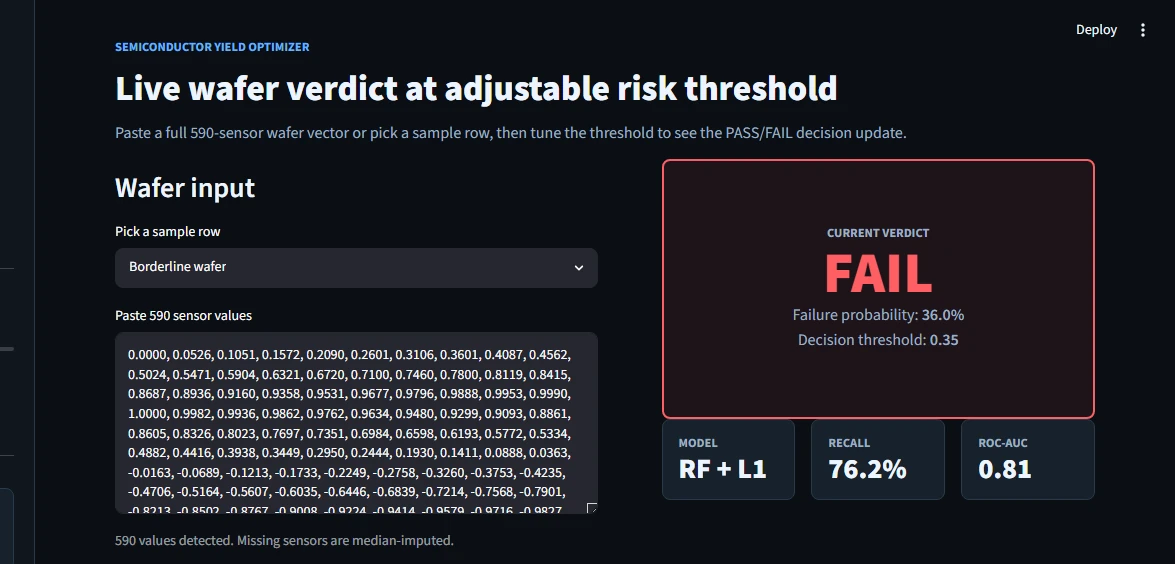
The winning recipe. Preprocess (drop constants, impute median, standard-scale), Lasso LogReg (C=0.1) for feature selection (590 → ~113), then RandomForestClassifier(n_estimators=500, class_weight='balanced', max_depth=6). Lands at 0.76 recall · 0.81 ROC-AUC at the 0.35 threshold. No SMOTE, the built-in class weighting handles the imbalance without over-correcting.
The default classification threshold (0.50) optimizes for accuracy. On a 14:1 imbalance, accuracy and recall pull in opposite directions. Lowering the threshold to 0.35 trades a few percentage points of precision for a meaningful jump in recall, exactly the trade you want when a missed defect is more expensive than a false alarm. The Streamlit slider exposes this so the operator can move it themselves; 0.35 is just the calibrated default.
Four serialized stages, one decision.
Every stage of the pipeline lives as its own joblib artifact in models/. The Streamlit app loads the four artifacts at boot, applies them in order to any wafer the operator pastes in, and returns a calibrated probability plus the PASS / FAIL verdict against the live threshold.
# 1. Preprocess
X = drop_constant_features(X)           # 590 → ~474
X = SimpleImputer(strategy='median').fit_transform(X)
X = StandardScaler().fit_transform(X)

# 2. L1 feature selection
selector = SelectFromModel(
    LogisticRegression(
        penalty='l1', solver='liblinear', C=0.1
    ),
    threshold='median'
)
X = selector.fit_transform(X, y)        # ~474 → ~113

# 3. Random Forest
clf = RandomForestClassifier(
    n_estimators=500,
    class_weight='balanced',
    max_depth=6,
    random_state=42,
)
clf.fit(X, y)

# 4. Tune threshold for recall
proba = clf.predict_proba(X_val)[:, 1]
threshold = 0.35 # cost-asymmetry defaultL1 before RF noise dimensions cause unstable splits; Lasso narrows feature space before trees. RF over XGBoost XGBoost + SMOTE over-corrects, predicting 80%+ failure rate; RF + class_weight handles the 14:1 ratio gracefully at this dataset size. Adjustable threshold no universal cutoff, costs differ per fab. Streamlit slider lets the operator tune live. Recall as the primary metric cost asymmetry: a missed defect is far more expensive than a false alarm.
The operator UI is one slider and one decision.
The Streamlit app at secom/app/app.py opens with the threshold slider front and center, a wafer-input pane, and a verdict tile that switches between green PASS and amber FAIL depending on where P(fail) lands relative to the slider. Below that: a per-feature contribution panel and the historical confusion matrix from the holdout set.